How to Use ESP32 with Arduino IDE in 2025
Unlock the power of the ESP32! This step-by-step beginner's guide shows you exactly how to set up and program any ESP32 board using the familiar Arduino IDE, including troubleshooting common errors.
Getting Started with ESP32 and Arduino
The ESP32 is a powerhouse microcontroller. For just a few dollars, you get a dual-core processor with built-in Wi-Fi and Bluetooth, making it the top choice for IoT (Internet of Things) projects, home automation, and robotics. While it's a sophisticated chip, the best part is that you can program it using an environment you may already know and love: the Arduino IDE.
This guide will walk you through every step of the setup process, from configuring the IDE to uploading your very first sketch. We'll also cover common troubleshooting steps that can save you hours of frustration.
Step 1: Add ESP32 Board Support to Arduino IDE
Unlike standard Arduino boards, the IDE doesn't know about the ESP32 out of the box. Our first step is to tell the IDE where to find the necessary files.
- Open your Arduino IDE.
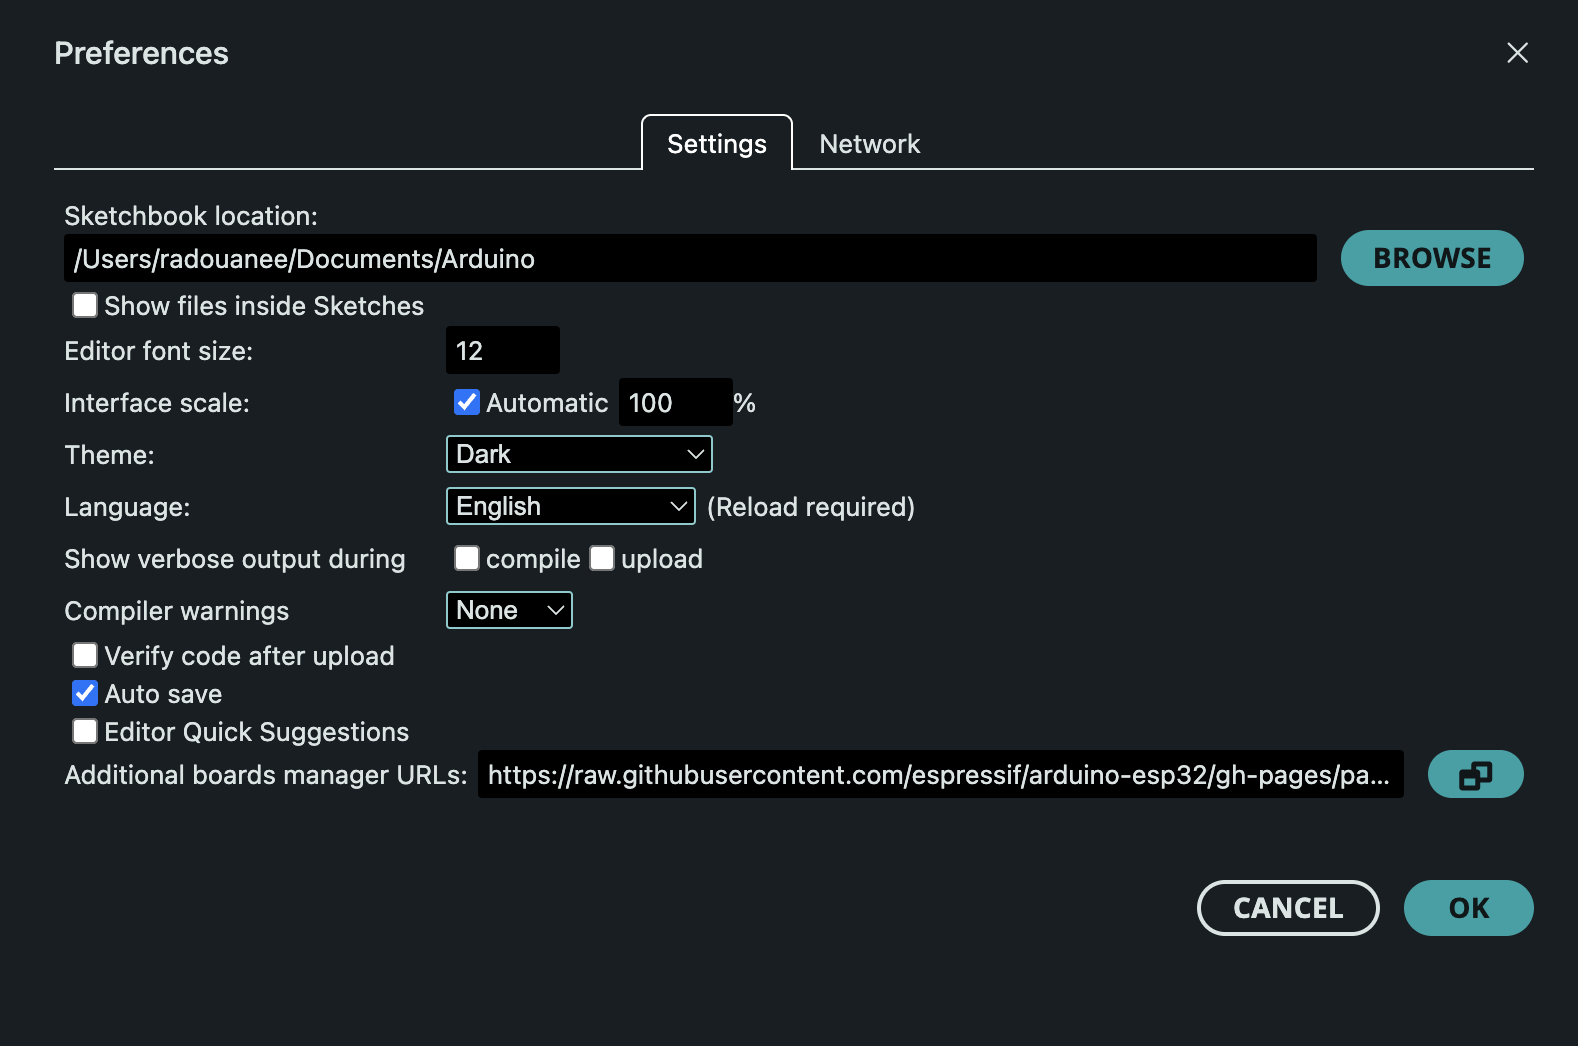
- Go to Arduino IDE > Settings (on macOS) or File > Preferences (on Windows/Linux).
Find the text box labeled "Additional boards manager URLs".

Paste the following URL into the box. If there are already other URLs, add this one on a new line.
https://raw.githubusercontent.com/espressif/arduino-esp32/gh-pages/package_esp32_index.json- Click OK to save and close the preferences window.
Step 2: Install the ESP32 Package via Boards Manager
Now that the IDE knows where to look, we can install the ESP32 hardware package.
- Navigate to Tools > Board > Boards Manager...
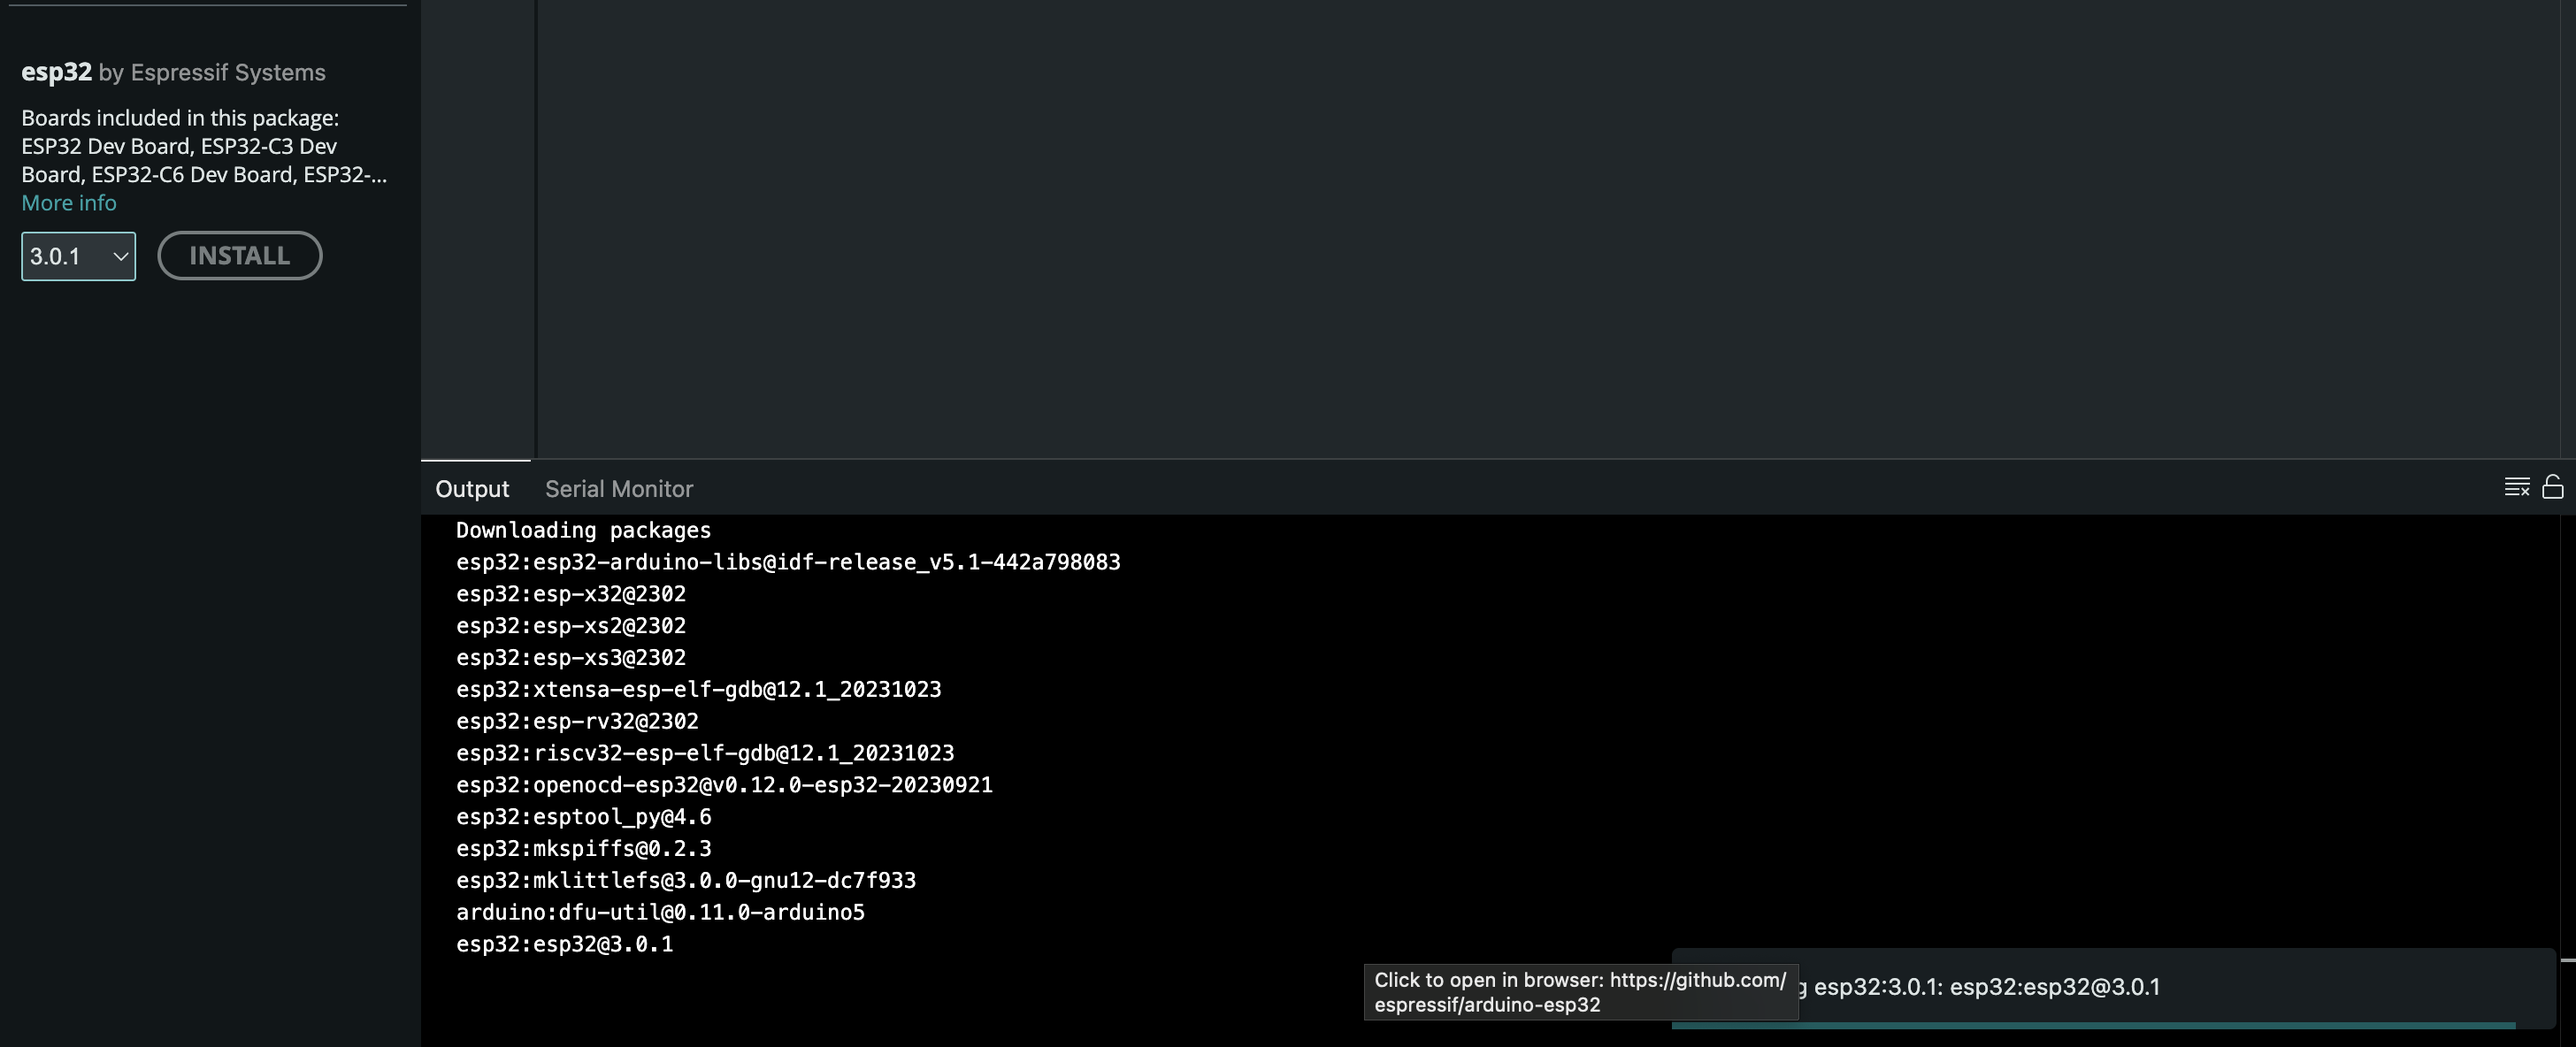
- In the Boards Manager window, type "esp32" into the search bar.
You will see "esp32 by Espressif Systems". Click the Install button.

The installation process will begin, downloading all the necessary tools and board definitions. You can watch the progress in the output console.

- Once it's finished, you can close the Boards Manager.
Step 3: Select Your ESP32 Board and Port
This is a critical step where many beginners run into trouble. You must tell the IDE exactly which board you have and how it's connected to your computer.
- Connect your ESP32 board to your computer with a USB data cable (be aware that some "charge-only" cables will not work).
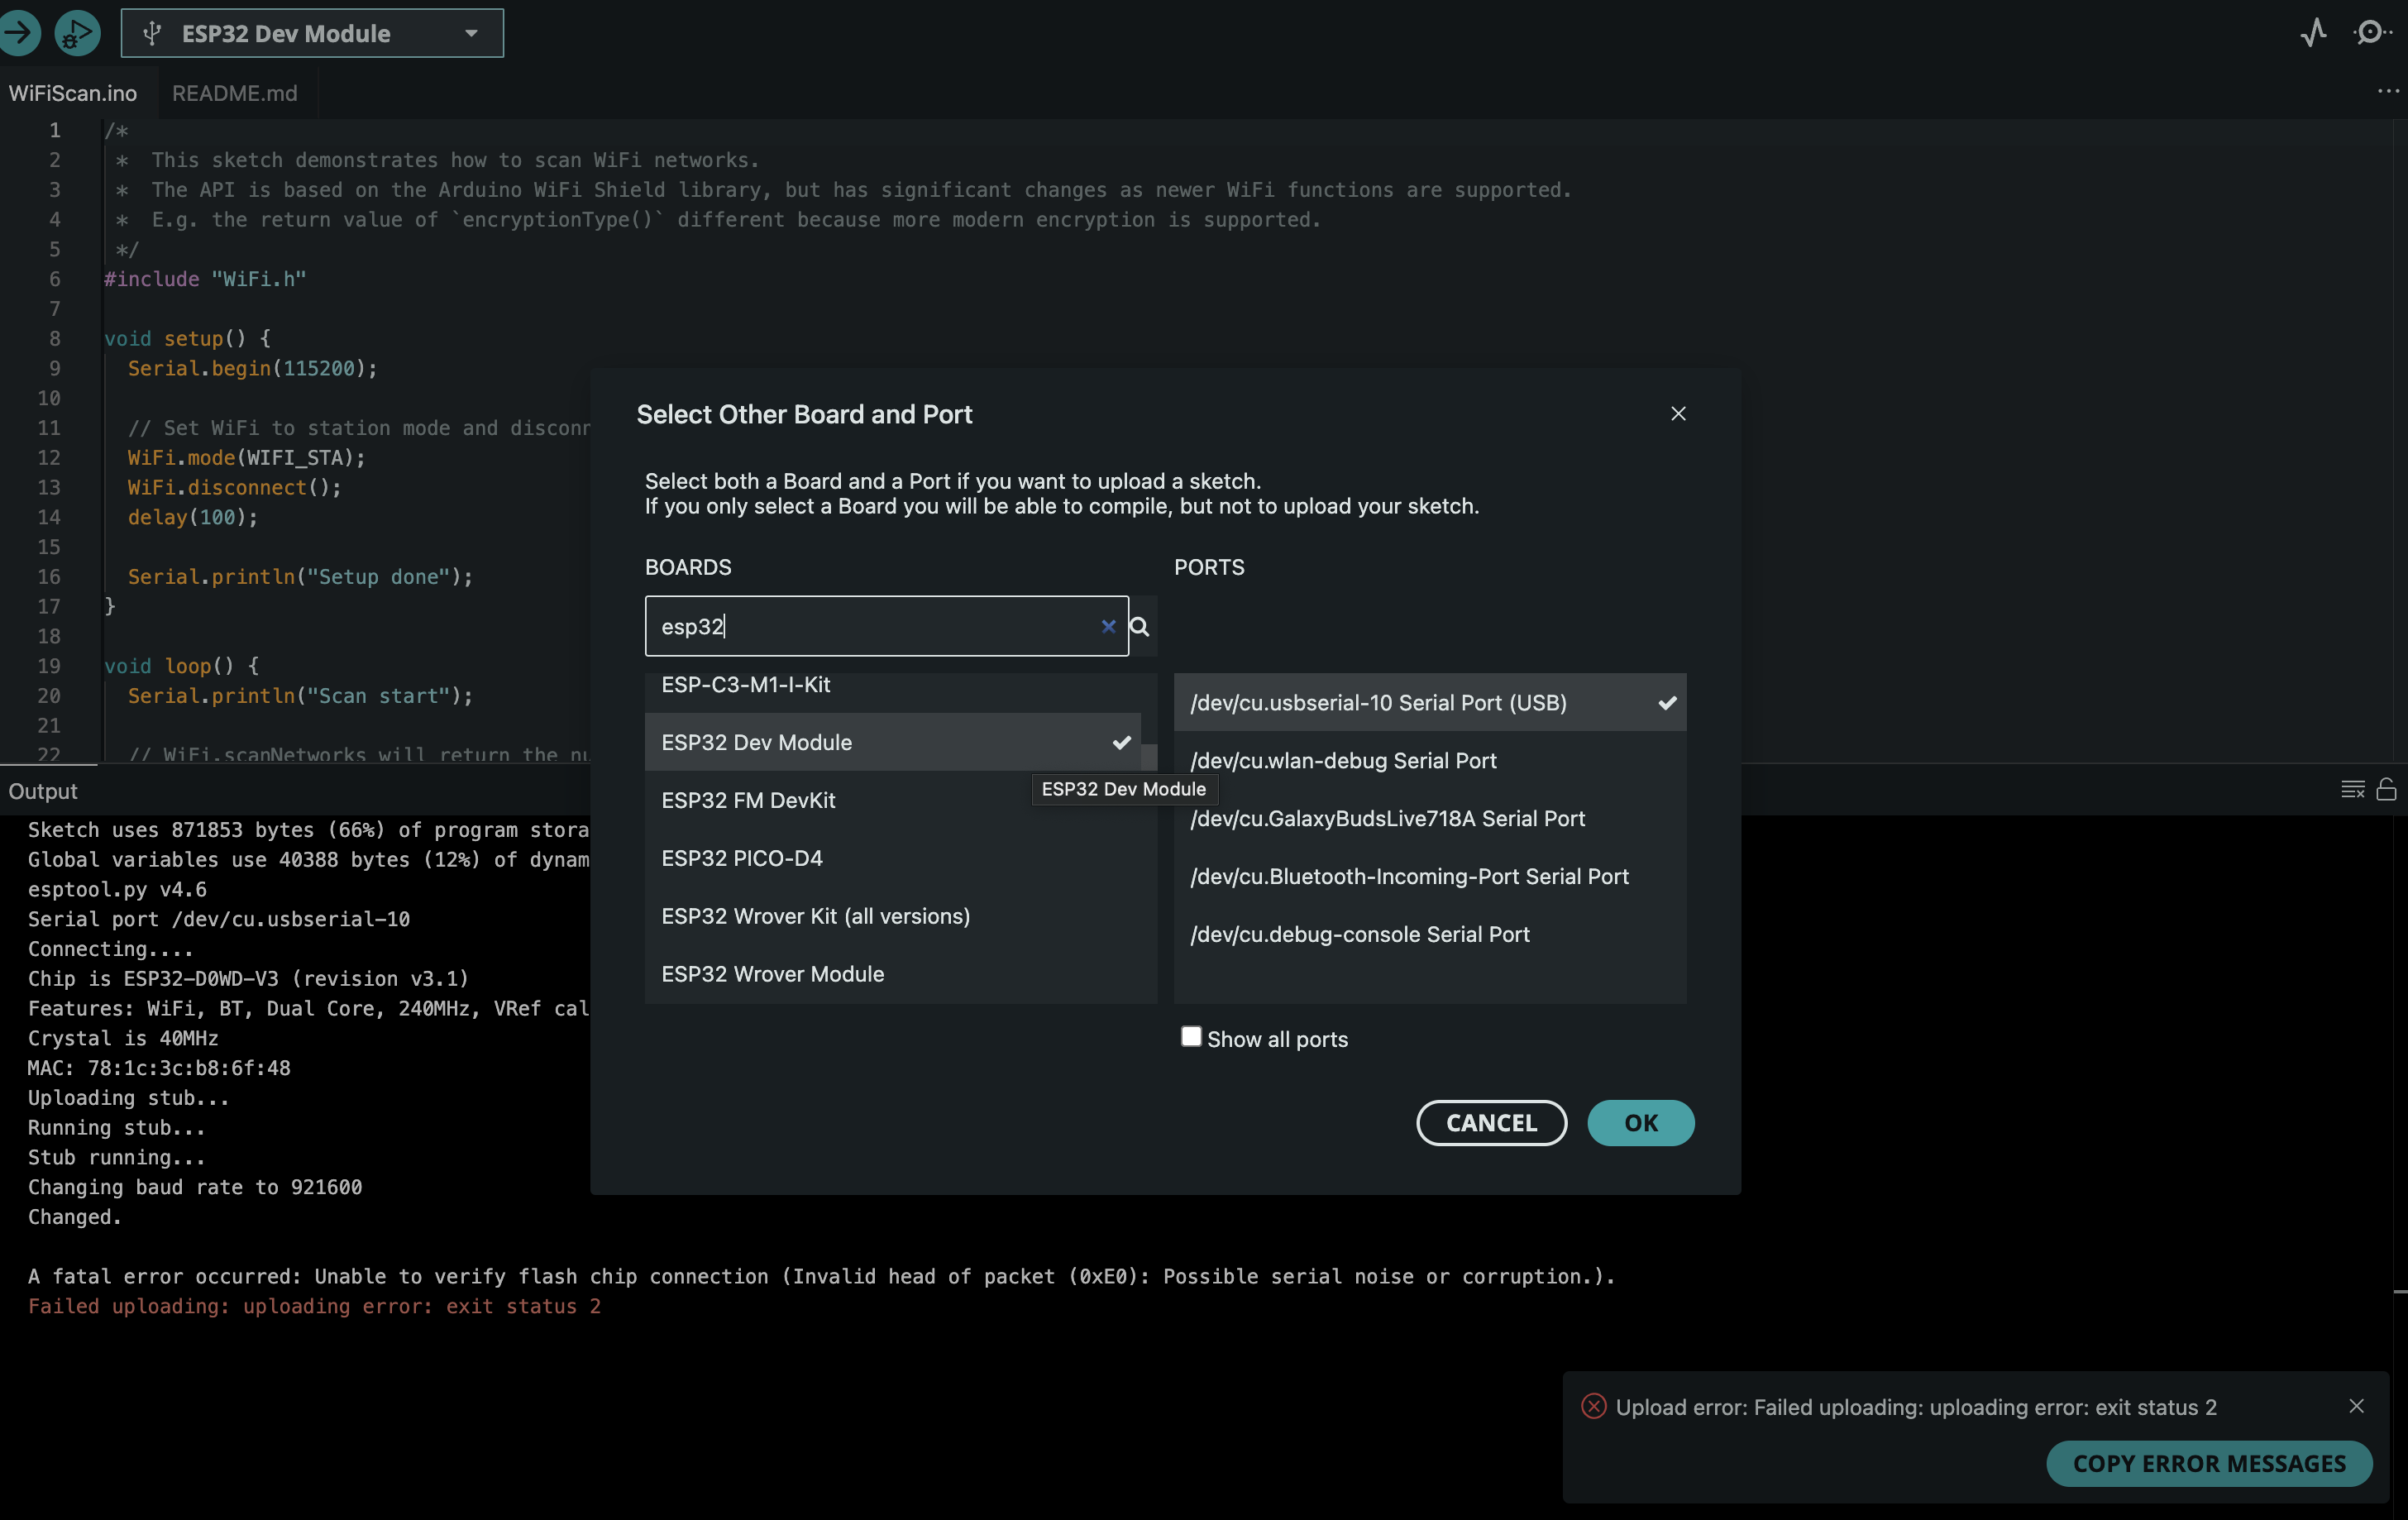
- Go to Tools > Board. You should now see a long list of new boards under the "esp32" heading.
- Select your specific board model. Look for a name printed on the board itself. A very common one is the "DOIT ESP32 DEVKIT V1". If you can't find an exact match, "ESP32 Dev Module" is a good generic option.
- Next, go to Tools > Port and select the serial port that your ESP32 is connected to. It will often be labeled with
usbserialorSLAB_USBtoUART. 
Step 4: Upload Your First Sketch (Hello, World!)
With everything configured, it's time to upload your first program to make sure it all works. We'll use a simple "Hello, World" sketch that prints to the Serial Monitor.
Copy and paste the following code into your Arduino IDE window.
/* ESP32 "Hello, World!" This sketch prints a message to the Arduino Serial Monitor. */ void setup() { // Start the serial communication at a baud rate of 115200 Serial.begin(115200); Serial.println("Setup complete. The ESP32 is ready!"); } void loop() { // Print a message every two seconds Serial.println("Hello from your ESP32!"); delay(2000); }- Click the Upload button (the right-arrow icon).
- The IDE will compile the sketch and upload it to your board.
Troubleshooting Common Upload Errors
Did you get a red error message in the console? Don't worry, this is very common. Here are the most frequent issues and their solutions.
- Error:
Failed to connect to ESP32: Timed out waiting for packet headerorA fatal error occurred: Unable to verify flash chip connection.- Solution 1: Manual Bootloader Mode. This is the most reliable fix.
- Hold down the
BOOTbutton on your ESP32 board. - While still holding
BOOT, press and release theRST(orEN) button. - Release the
BOOTbutton. - Try uploading your sketch again.
- Hold down the
- Solution 2: Check Your USB Cable. Make sure you are using a data cable, not a power-only one. Try a different cable if possible.
- Solution 1: Manual Bootloader Mode. This is the most reliable fix.
- Error:
Possible serial noise or corruptionor you see aWARNING: Detected crystal freq...message.- Solution: Lower the Upload Speed. Some boards have slight hardware variations. Slowing down the communication makes it more reliable.
- Go to Tools > Upload Speed.
- Change the value from
921600to a slower speed like115200. - Try uploading again.
- Solution: Lower the Upload Speed. Some boards have slight hardware variations. Slowing down the communication makes it more reliable.
Conclusion: Your Journey Begins!
If you've followed these steps, you now have a fully functional environment for programming your ESP32. You've successfully configured the IDE, selected your board, and uploaded your first sketch.
The true power of the ESP32 awaits. You can now explore its vast capabilities, from scanning for Wi-Fi networks and hosting a web server to controlling motors and connecting to Bluetooth devices. Your journey into the exciting world of IoT has just begun!
Comments (0)
No comments yet. Be the first to comment!
Leave a Comment