How to Use a Stepper Motor with an L298N Driver & Arduino
Stepper motors are the go-to choice for applications like 3D printers, CNC machines, and robotics, where exact positioning is critical. However, you can't just plug a stepper motor directly into an Arduino. You need a muscle to do the heavy lifting—and that's where the L298N motor driver comes in.
This step-by-step guide will show you exactly how to use a stepper motor with an L298N driver and an Arduino UNO. We'll cover the components you need, the wiring connections, and a simple Arduino code to get your motor spinning.
What You'll Need: The Components
Let's quickly go over the key components for this project. Having a basic understanding of what each part does will make the process much clearer.
| Component | Description | Why you need it |
|---|---|---|
| Stepper Motor | An electric motor that moves in discrete steps, allowing for very precise control over its position. The one pictured is a common NEMA 17. | This is the part that provides the rotational motion for your project. |
| L298N Motor Driver | A dual H-Bridge motor driver that acts as the interface between the Arduino and the motor. | The Arduino's pins can't supply enough current to power a stepper motor directly. The L298N takes the low-current control signals from the Arduino and delivers the high-current power the motor needs. |
| Arduino UNO | A microcontroller board that acts as the "brain" of the project. | We will upload our code to the Arduino to tell the L298N driver how and when to move the stepper motor. |
| External Power Supply | A battery pack (like the one with four 18650 batteries shown) or a DC power adapter. | The stepper motor requires more power than the Arduino can provide via USB. This dedicated power source ensures the motor runs smoothly without damaging the Arduino. |
| Jumper Wires | For connecting all the components together. | These are the "nerves" of your circuit, carrying power and data signals. |
Wiring It All Up: The Connection Guide
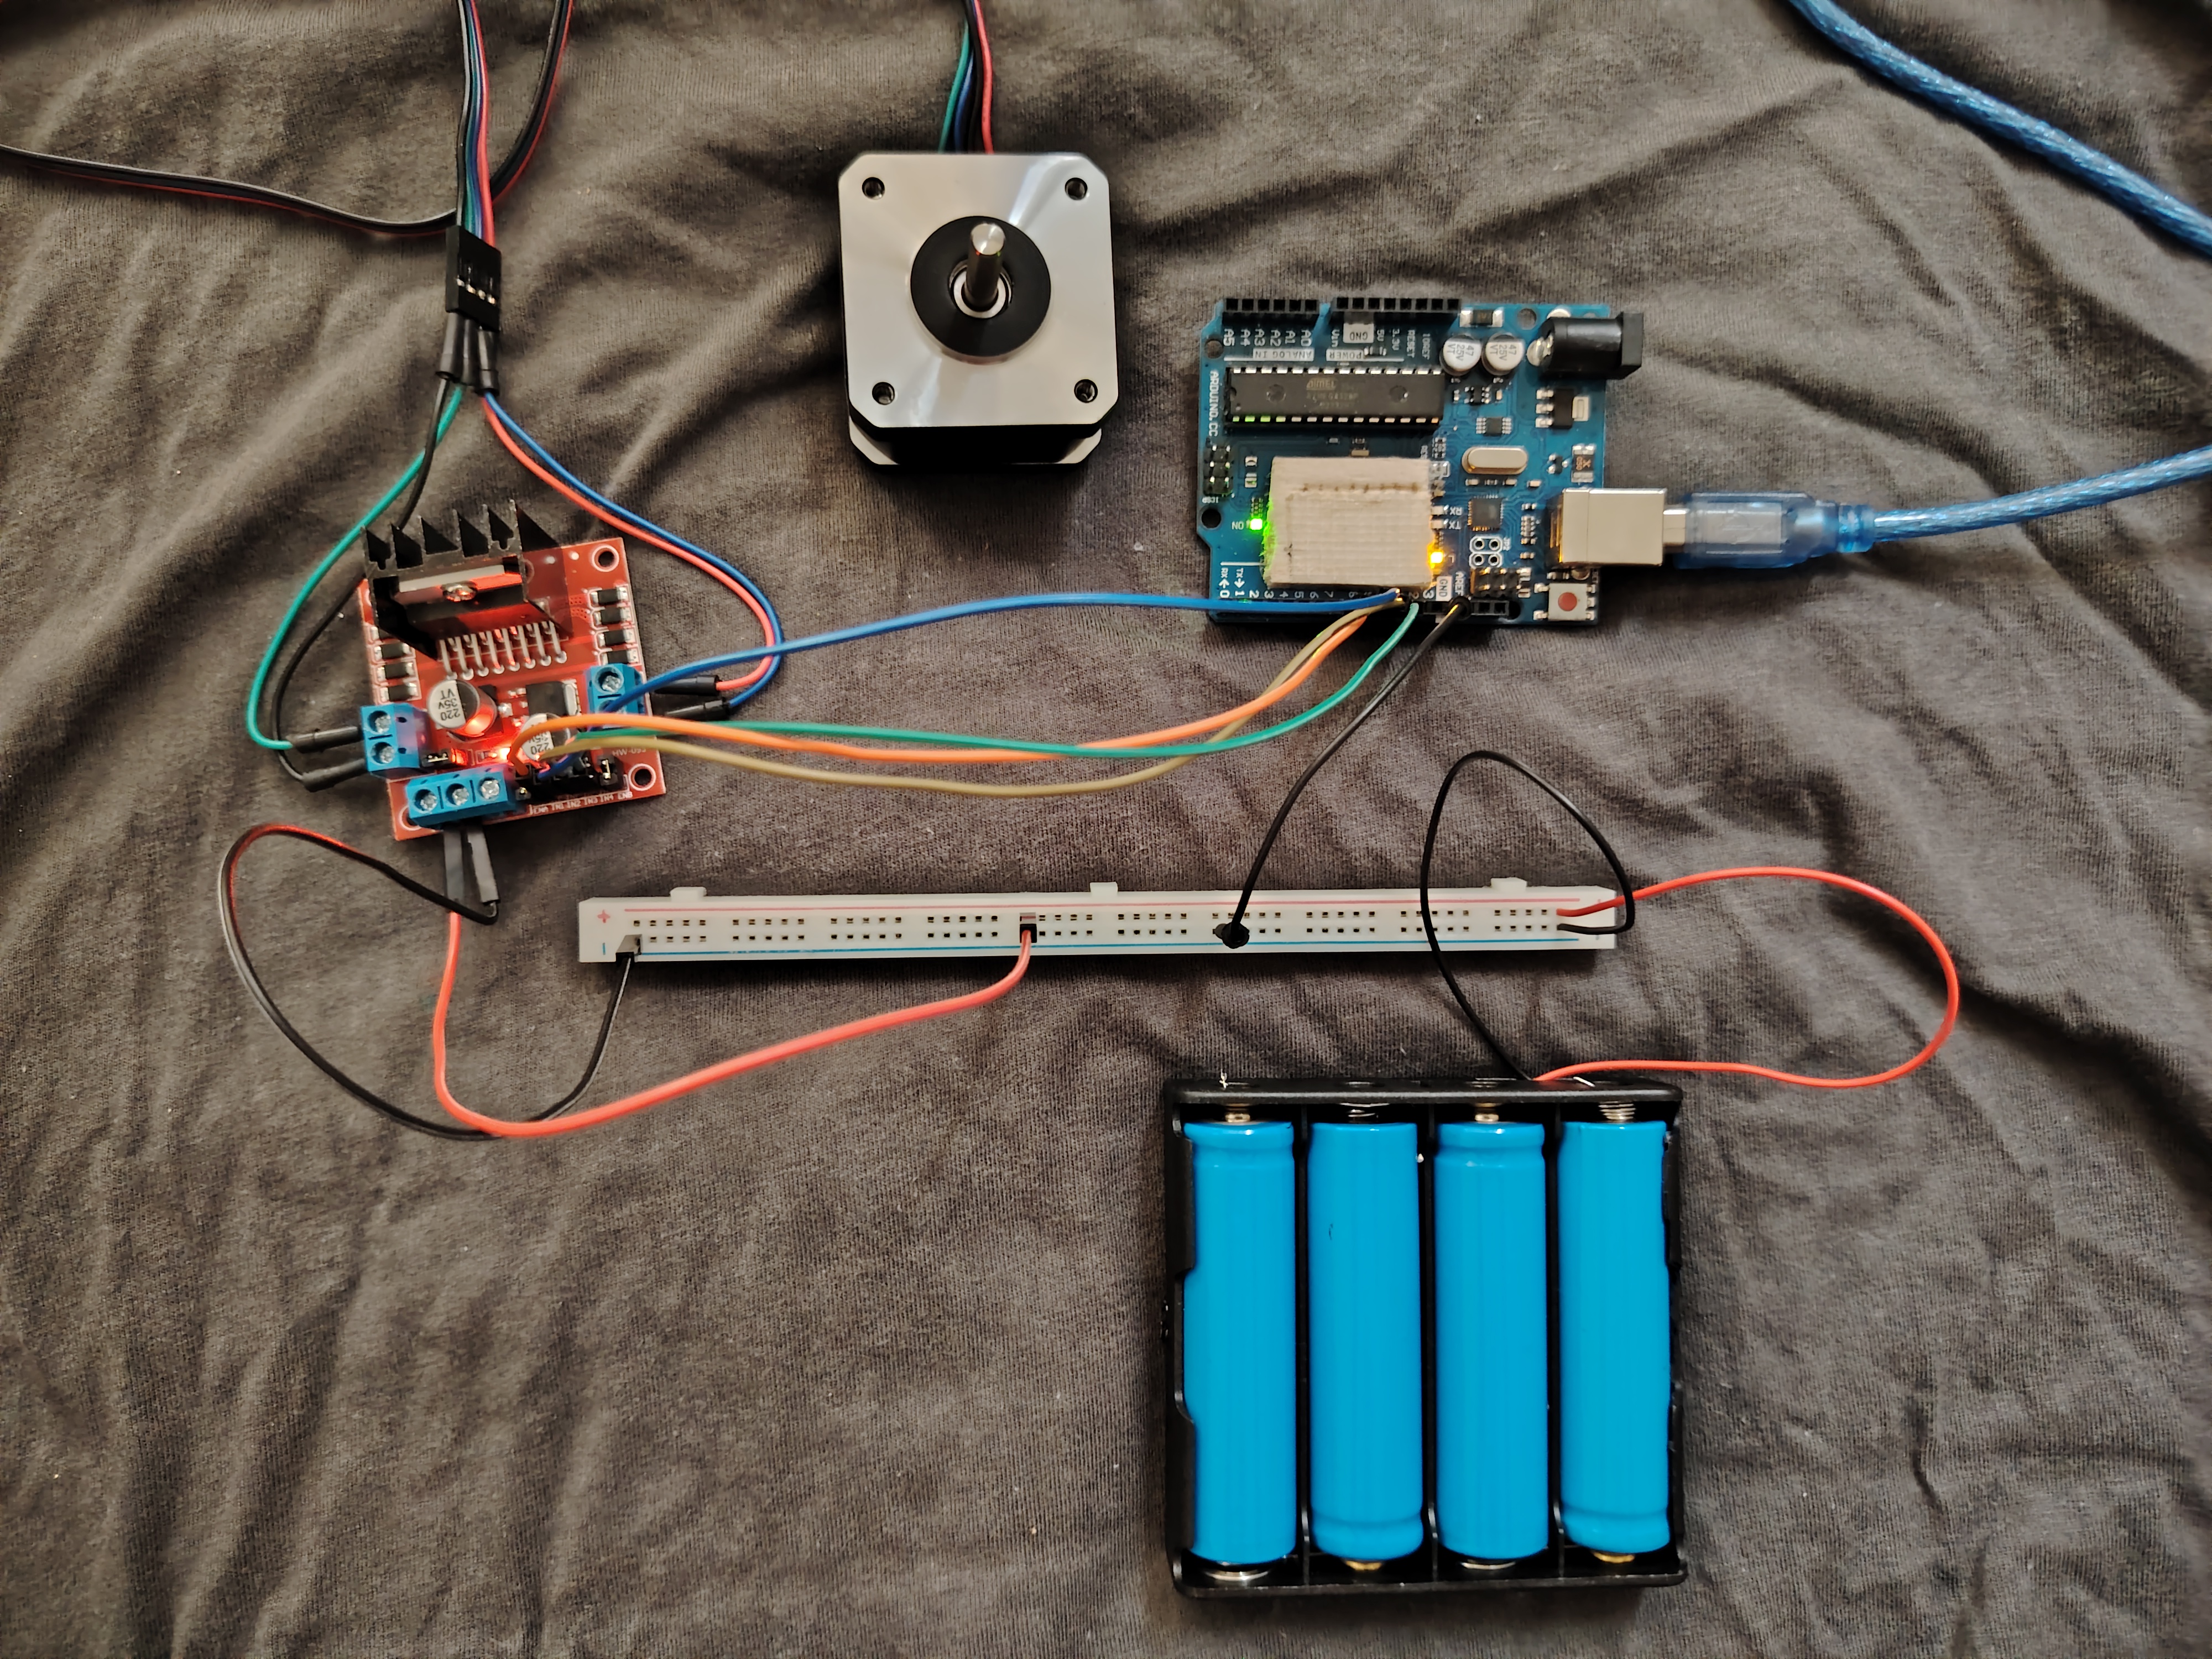
This is the most crucial part. Follow the wiring diagram and the photo provided carefully. A wrong connection can prevent the motor from working or even damage your components.
Here are the connections, step-by-step:
1. Power Connections:
- Connect the positive (+) wire from your battery pack to the VCC screw terminal on the L298N driver.
- Connect the negative (-) wire from your battery pack to the GND screw terminal on the L298N.
- Crucial Step: Create a common ground. Run a jumper wire from the GND terminal on the L298N to one of the GND pins on the Arduino UNO.
2. Control Signal Connections (Arduino to L298N):
- Connect Arduino Digital Pin 8 to L298N Pin IN1.
- Connect Arduino Digital Pin 9 to L298N Pin IN2.
- Connect Arduino Digital Pin 10 to L298N Pin IN3.
- Connect Arduino Digital Pin 11 to L298N Pin IN4.
3. Motor Connections (L298N to Stepper Motor):
- Your stepper motor will have four wires. Connect these four wires to the output screw terminals on the L298N, marked OUT1, OUT2, OUT3, and OUT4.
- Note: The order of these wires is very important. If the motor just vibrates or jitters, the most common fix is to swap the middle two wires (the ones connected to OUT2 and OUT3).
Once you're done, your setup should look similar to this:
Understanding the Arduino Code
Now let's tell the motor what to do. The code below uses Arduino's built-in Stepper.h library, which makes controlling the motor incredibly simple.
/*
 Stepper Motor Control - one revolution

 This program drives a unipolar or bipolar stepper motor.
 The motor is attached to digital pins 8 - 11 of the Arduino.

 The motor should revolve one revolution in one direction, then
 one revolution in the other direction.

 Created 11 Mar. 2007
 Modified 30 Nov. 2009
 by Tom Igoe
*/

#include <Stepper.h>

// Define the number of steps per revolution for your motor.
// This is commonly 200 for 1.8 degree-per-step motors.
const int stepsPerRevolution = 200;

// Initialize the stepper library on pins 8 through 11.
// The order matches the connections to IN1, IN2, IN3, and IN4.
Stepper myStepper(stepsPerRevolution, 8, 9, 10, 11);

void setup() {
  // Set the motor speed in rotations per minute (RPM):
  myStepper.setSpeed(60);

  // Initialize the serial port to see the output messages:
  Serial.begin(9600);
}

void loop() {
  // Step one revolution in one direction (clockwise):
  Serial.println("Clockwise");
  myStepper.step(stepsPerRevolution);
  delay(500); // Wait for half a second

  // Step one revolution in the other direction (counter-clockwise):
  Serial.println("Counter-clockwise");
  myStepper.step(-stepsPerRevolution);
  delay(500); // Wait for half a second
}
Code Breakdown:
#include <Stepper.h>: This line imports Arduino's built-in library for controlling stepper motors.const int stepsPerRevolution = 200;: This variable holds the number of steps it takes for your motor to complete one full 360° rotation. A value of 200 is very common (360° / 1.8° per step = 200 steps). Check your motor's datasheet if you have one.Stepper myStepper(stepsPerRevolution, 8, 9, 10, 11);: This is where the magic happens. We create aStepperobject namedmyStepperand tell it two things: how many steps are in a revolution, and which Arduino pins are connected to the L298N driver's IN1, IN2, IN3, and IN4 pins.myStepper.setSpeed(60);: Inside thesetup()function, we set the motor's speed to 60 RPM. You can change this value to make it spin faster or slower.Serial.begin(9600);: This starts serial communication, allowing the Arduino to send messages back to your computer. You can view these in the Arduino IDE's Serial Monitor.myStepper.step(stepsPerRevolution);: This command in theloop()function tells the motor to move. The positive number tells it to move a full revolution in the default (clockwise) direction.myStepper.step(-stepsPerRevolution);: Using a negative number makes the motor spin the same number of steps but in the opposite (counter-clockwise) direction.
Upload and Run!
- Connect your Arduino UNO to your computer via USB.
- Open the Arduino IDE.
- Copy and paste the code above into a new sketch.
- Go to Tools > Board and select "Arduino UNO".
- Go to Tools > Port and select the port your Arduino is connected to.
- Click the Upload button.
Once the code is uploaded, your stepper motor should turn one full revolution clockwise, pause for half a second, and then turn one full revolution counter-clockwise, repeating the cycle. Open the Serial Monitor (Tools > Serial Monitor) to see the "Clockwise" and "Counter-clockwise" messages printed in real-time!
Frequently Asked Questions (FAQ) & Troubleshooting
- Why is my stepper motor just vibrating or twitching? This is almost always due to the motor wire order being incorrect. Try swapping the two middle wires on the L298N's output terminals (the wires going to OUT2 and OUT3).
- Why is the L298N driver getting hot? It's normal for the L298N to get warm, as it's handling a lot of current. However, if it's too hot to touch, it could mean your power supply voltage is too high for your motor or the motor is drawing too much current. Always try to match your power supply to your motor's recommended voltage.
- Can I change the speed and rotation angle? Absolutely! To change the speed, modify the number in
myStepper.setSpeed(60);. To change the angle, modify the number inside themyStepper.step()command. For example,myStepper.step(100);would rotate it half a revolution (if stepsPerRevolution is 200).
You now know how to control a stepper motor with an L298N driver and an Arduino. This is a fundamental skill in the world of DIY electronics and opens the door to hundreds of amazing projects.
Comments (0)
No comments yet. Be the first to comment!
Leave a Comment